I am sure this is nothing new in the crafting world-but it is adorable. Just pop the book (Lisa's or the one on the Candy Cane) and the supplies into the workbox and then you'll have a lovely family activity! (not the glue gun if you will be using that)
image from Amazon.com
Using
Lisa Whelchel's ADVENTure of Christmas book as our jumping off point (on the history of the candy cane) we made these puppies or shalt I say deersies (? new word there for ya)...they are really easy too.
No candy cane deer was injured during the posing of this picture, neither was it strangled by the string.
This is actually hanging from one of those magnetic hooks and let me tell ya, these are awesome. Before getting them, I had that hook thing you hang on the door, the one where part of it hooks to the top of the door and that caused the weather stripping to gap letting in cold air. Plus, these won't hurt the paint on the door. I am so excited to have our wreath hanging on our front door without all the annoyances those hooks caused. This is a spare and I put it up on the inside of the door-made for a great photo op here. :)
Supplies needed:
Red and white candy canes (we only had these green/red ones to use during this session, but will be using red/white for the additional ones we'll make this weekend)
Pipe Cleaners/Fuzzy Stix (Meijer's brand is called this) -One per deer [18"] (now Lisa says to use 2 but we only used one-and it looks just fine)
Wiggly Eyes (we have colored ones but black eyed ones are good too) obviously 2 per critter
Ribbon (about 8" per deer)
Small Pom-Poms (I found red ones in a package of at least 30 or so in it-I believe at JoAnns but any craft store should have these, black would be cute too)
Glue (I used a glue gun but will use tacky glue when we do this with the little kiddos, we didn't find the glue melting the wrapper so as long as the tip doesn't touch the stuff, it should work OK)
Scissors
Directions:
Basically, glue the eyes and nose on the front hook part of it. Tie a bow around the neck area. Cut the pipe cleaner in half. Twist one half around and form antlers. Cut the second section into two parts, twist each half onto the straight antler parts. We manipulated the pipe cleaner a bit to better resemble antlers.
Story behind it:
This is the shortened version of it: A candy maker decided to make candy sticks for the babies/toddlers to suck on to keep them quiet/non-fussy. Then in the 1670s a choirmaster decided to angle them into shepherds crooks, again this was used to keep the little ones quiet. And, after all shepherds use crooks to herd their sheep and Jesus is called our Shepherd in the Bible. Then later on, hundreds of years later (or so it is told) a candy maker in Indiana decided to add the thick red stripe to remind folks of Jesus' blood that was shed on the cross, Then smaller ones were added to symbolize the lashes Jesus received prior to being hung on the cross. The white color is to remind children that Jesus lived a life without sin. The peppermint was added to mimic hyssop which is a plant that was used in Old Testament times for sacrifices. Obviously, Jesus was the ultimate sacrifice for mankind by defeating death and bearing our sins on the cross. Apparently, the hardness of the candy mimics the fact that Jesus is our Rock of Salvation. Awesome heh? Oh yea, turn the candy cane upside down and you have yourself a "J"...which is another way to remember Jesus. This is a cute and tasty treat that opens the door to sharing with family and friends, what Jesus did for us some 2000 years ago.

There is also a great book that explains the candy cane-we read that last year when we did the Christmas Lapbook: The Legend of the Candy Cane (which you can find the mini-books to on Homeschool Share) It was written by Lori Walburg.
Enjoy!!!


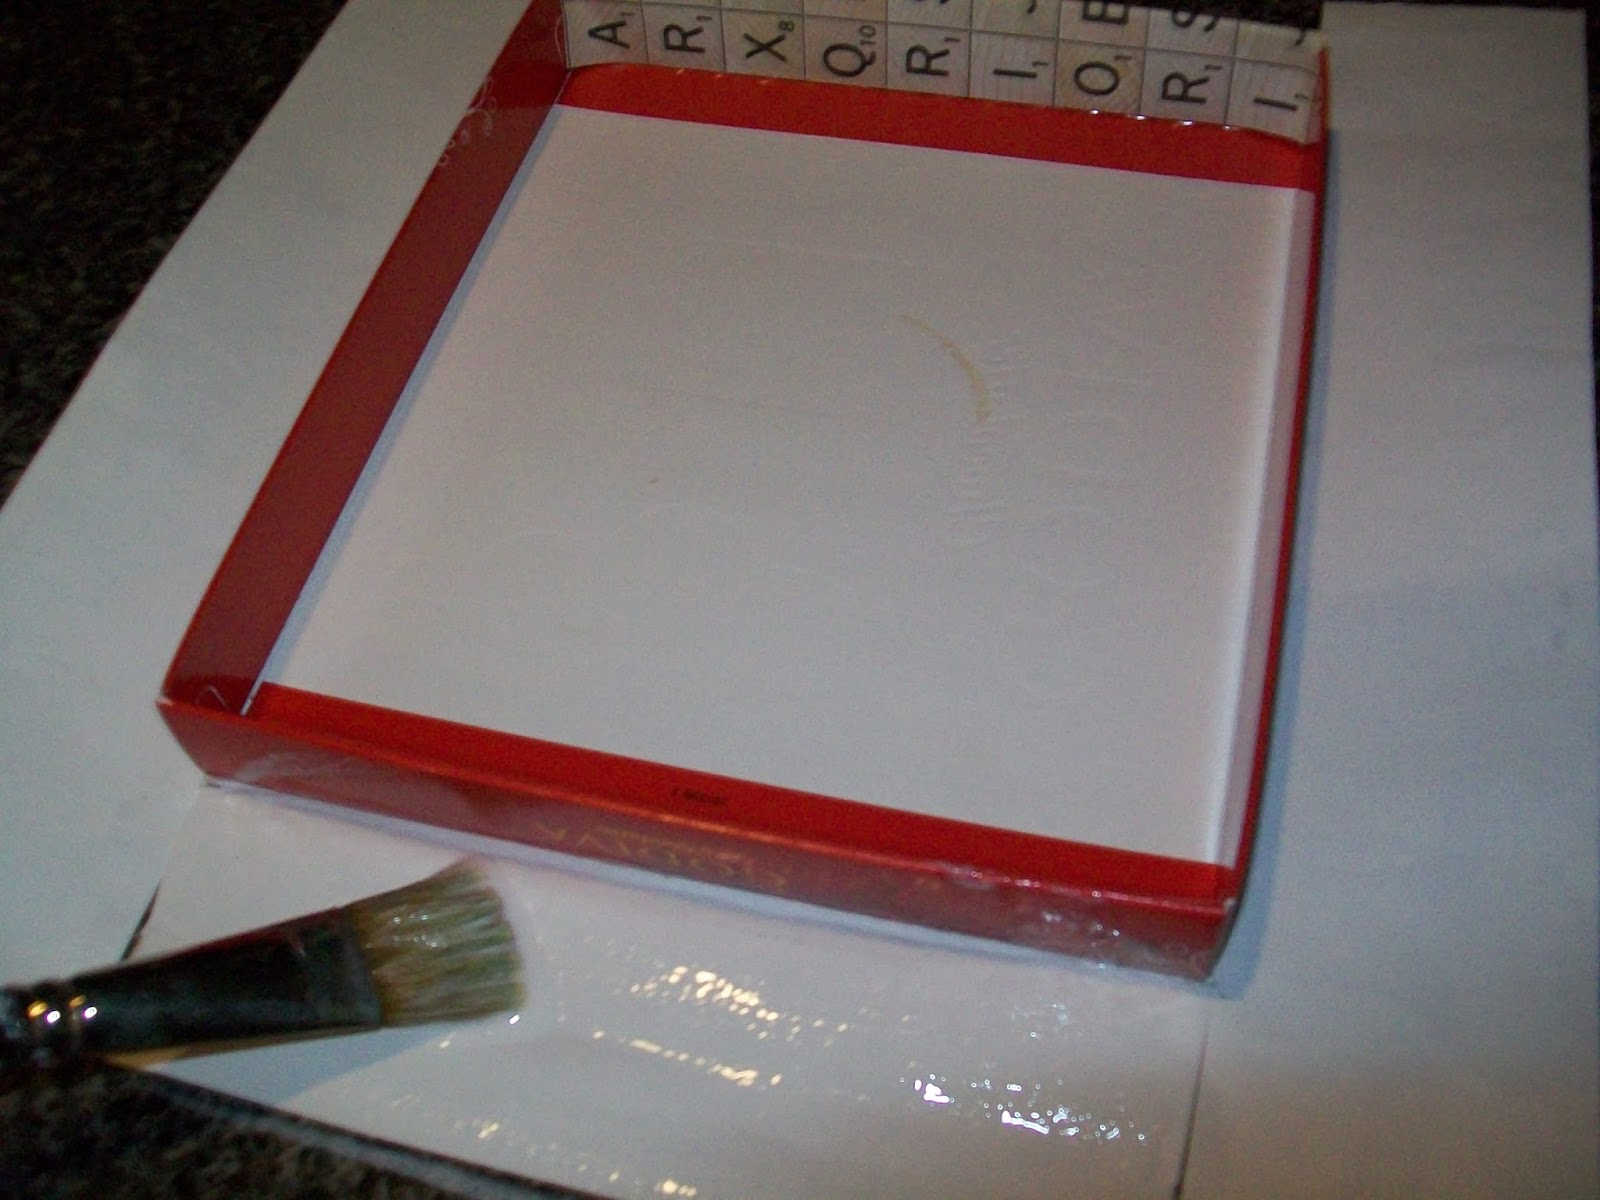
 Well, being frugal is always a great way to start. So you search your humble abode, and perhaps even ask friends/family for those particular boxes that once housed delicate chocolates or sugar packs. Then you scrounge thru your various scrapbooking paper, collect glue, scissors, a bowl and a brush and you get busy. And that is exactly what I have done lately. Whenever we get (usually a gift) those nice quality chocolates, I always save the boxes. My husband actually found one I tucked away and he had the nerve to pitch it. I gasped in horror and immediately plucked it from its demise. Thankfully there wasn't anything in the trash yet so it was safe from grossness, and I must say-he won't make that mistake again. The shocked look from such outlandishness across my dazed face surely left a lasting impression on him. LOL
 Now I do not have a canister of Modge Podge about the house, so I did what any frugal gal would-I made the 'poor man's version' of it using Elmer's Glue and water to thin it. Worked like a charm!